Archive

Archive for the ‘Project Log’ Category

New Tranny Rocks, But Fuel Problems

August 15th, 2009 Comments off

Got the truck back from the transmission shop.  I also had them check the timing and whatnot.  They said my plugs and wires were still good, but that my timing had been off.  The total bill for the rebuild, shift kit, and timing was $1100 which is a lot better than I thought it would be.

I was a bit disappointed though – on the way home it was STILL doing the “stall/trying to die” thing (which I noticed it doing on the way to the shop in the first place).  At first I was sort of pissed because I thought “Surely they noticed that.”  But then I made a connection – it only seemed to be doing it on hills.  By the time I got past the hills and on the flat stretches on the way home, it was doing ok.  Then after parking on the (very inclined) driveway for a while, I started it up.  Idled ok for a minute, then started to really get rough.  After asking for some advice on the forums and from my buddy Dan  I decided to get a new fuel pump ($40) and a new, higher flow in line fuel filter.

Boy howdy.  THAT made a difference.  Started right up and Brian and I took it for a spin.  Did great.  I thought I detected a little hesitation once or twice, but nothing major.  And that could have been my imagination.

The new tranny is teh roxxors.  If I come to a complete stop on a flat and then floor it, it smokes the tires.  A lot.  I was quite pleased.

So Tranco MIGHT turn out to be ok.  But there are three things that make me hesitate to say “they have my business”.

1) I shouldn’t have had to figure out the fuel pump thing on my own.  They should have caught that.

2) The tranny is COVERED in ATF.  I’m going to degrease it tomorrow and see how it holds up.

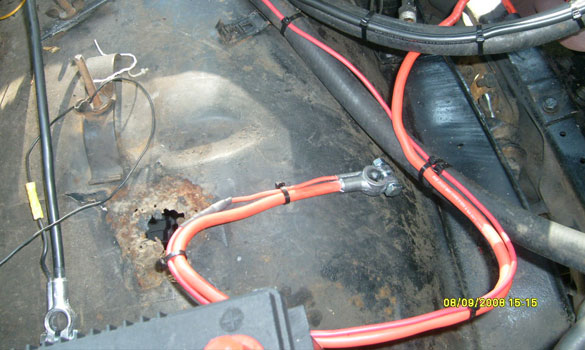
3) Ok, so I JUST finished redoing the wiring.  And I had both leads going off the back of the battery towards the firewall.  When I got the truck back and opened the hood for the first time I immediately noticed that the hot was going sideways, towards the driver side.  Not a big deal, it had just been rotated 90 degrees.  In fact I remember saying “I wonder what they had to disconnect the battery for.”  Well when I took the hot off tonight to get it out of the way while I took out the fuel pump, the frikken post clamp was cracked clean in half!  Now, you could tell it was just a defective part.  And I didn’t even notice anything wrong until I unbolted it from the post – so probably the guy never even noticed that it cracked when it went on.  But I couldn’t help but cut my eyes and wonder if he had done it and just said “his problem now.”  Man I hope not – cause he see mes like a real nice guy.

Anyway.  I’m outta truck money for now – gotta get caught back up after dropping all the cash on the tranny.  But hey – it runs now!  And well, too.  So for the next little bit, it will be only labor investments – and I have one planned for tomorrow.

I am bound and determined to fix the sticky ignition.

EDIT 2014 Update:
The tranny rebuild turned out to be crap actually. I put less than 200 miles on it before it had filled the pan with brass shavings. I chucked the th350 for a street build 700r4 when I did my engine swap to get the overdrive. I still haven’t really “run” it on that new tranny, so I don’t know if that was a good move or not, but I hope it was.
Categories: Project Log Tags:

Update on Mystery Parts

August 12th, 2009 Comments off

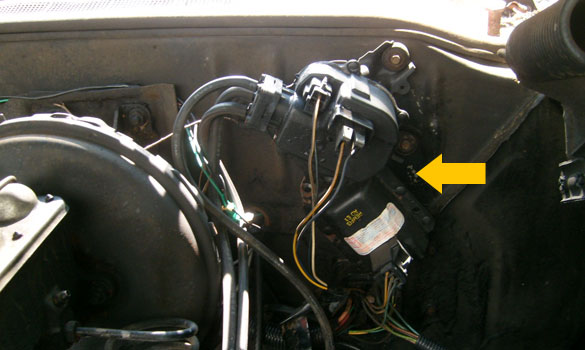
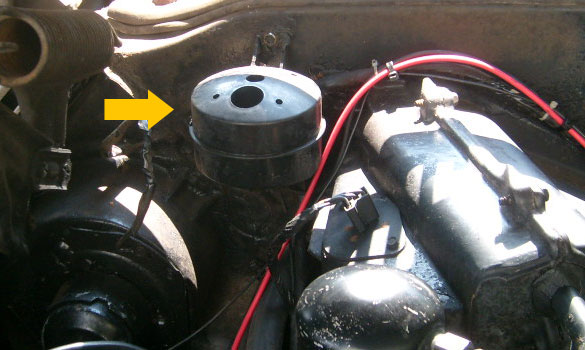
Turns out this thing:

Passenger side on the firewall.

Passenger side on the firewall.

… is the “vacuum reservoir” for the AC unit.  The AC is mostly gone from the engine compartment.  I’m leaving it on the firewall, but I disconnected it from the vacuum line.

EDIT: Also called the “accumulator ball”.  Ok, disconnecting that turned out to be a bad idea.  Even with no AC, you still need that line to operate the vent controls.  Without it, the various selection controls do nothing.  Took me 7 months to figure that out, sadly.

EDIT 2014 Update:
I now have aVintage Air system that does away with all the vacuum components. So I have now removed the accumulator.

Categories: Project Log Tags:

Tranny Rebuild

August 12th, 2009 Comments off

Took her into to Tranco.  I was a little dubious – I had heard good things and bad things.  I talked to the guy there about my issue, and after some discussion it looks like the best option is a rebuild.  I’d have to do that eventually anyway.  I had done some price checking on the web and rebuilds on a TH350 look to cost anywhere from $250 to $2500.  That huge difference mainly centers around the “I know a guy” factor vs. reputable shop, and how much they have to actually do.  I could get a new (reman anyway) TH350 for around $1400, but then I’d have to pay shipping and installation.

But after getting it to the shop (it tried to die most of the way) and talking to them, I felt like I had made about the safest decision I could have.  The guy I talked to is a Chevy guy – used to do late 60’s early 70’s hotrods and whatnot, which makes me feel a little safer.  I also talked to him about shift kits, and he offered to do the modifications as part of the rebuild at little cost, so that’s fantastic.  I’m going to get the whole reman, with shift kit, for under a grand.  That’s good for the budget.  Other good news: the Chevy guy is the mechanic too (not specifically a tranny guy), so I’m looking to have them do the tuneup as well.  I feel pretty good so far because he gave me that first quote with the caveat of “if all the hardparts are ok”.  So I half expected to get the “we have to replace all your hardparts” call, because I know a lot of places pull that crap.  But when we talked he said that it was ok except for the pump (which I expected) and a bushing.  Well, I’d call that pretty lucky!  So I get the feeling that they are being straight with me.  I’m think part of that might be that they know that I’m doing a resto – and if they don’t screw me over, they will probably get a good bit of business out of me.

I really hope these guys turn out to be good – they are less than 2 miles from the house and that would make my life a lot easier.  Plus they like American cars – I really like SHA, but I know they focus on imports.  They came out and said there would be some stuff they couldn’t do for me.  Plus they are waaaaaaay far from the house.

Hopefully I’ll have a well running truck by Monday!  One can always hope.

EDIT 2014 Update:
Yeah, don’t go to Tranco. It leaked since the day I got it back until I got rid of the thing. It also filled the pan up with a nice layer of brass dust, though admittedly it could have been that they never cleaned the old pan out. Either way, crappy job.

Categories: Project Log Tags:

Lots of Work Today – No More Steering Squeal!

August 9th, 2009 Comments off

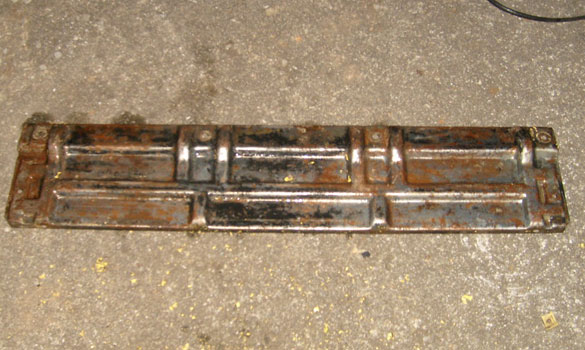
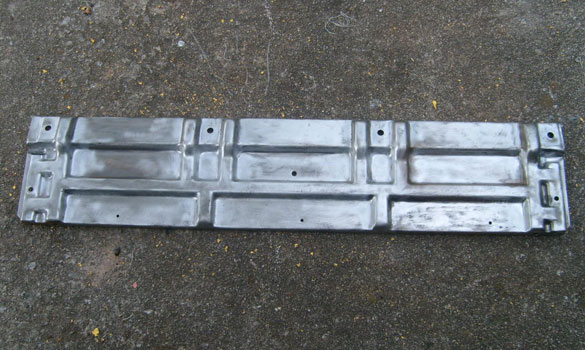
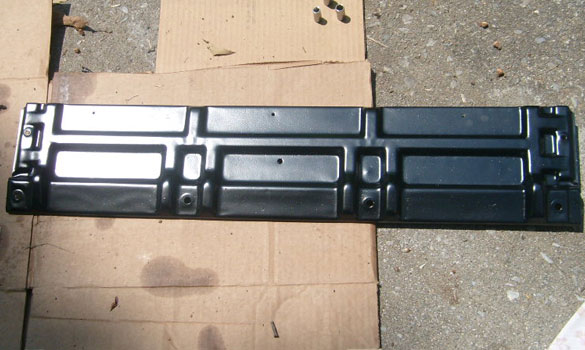
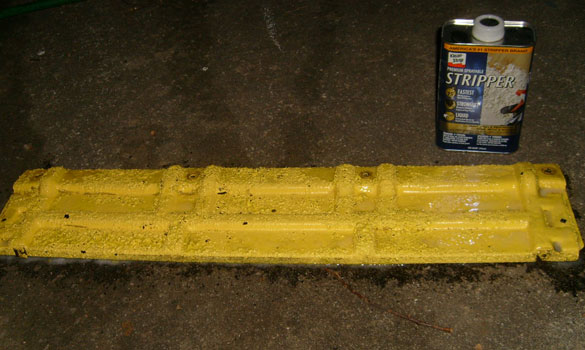
I got a lot done.  Part of it last night, but most of it today.  I got the yellow cowl plate clean!  First I chem stripped it, then I applied rust converter.  After the rust converter cured, it was apparent that the rust converter wouldn’t really work, so I wire brushed it all off down to the bare metal.  Took hours.  Shot it with some primer and Rustoleum and it looks a lot better:

Mmmm...  chemicals.  I wore a mask, goggles and gloves.

Mmmm... chemicals. I wore a mask, goggles and gloves.

After the chemical strip.

After the chemical strip.

After wire brushing.

After wire brushing.

Repainted!

Repainted!

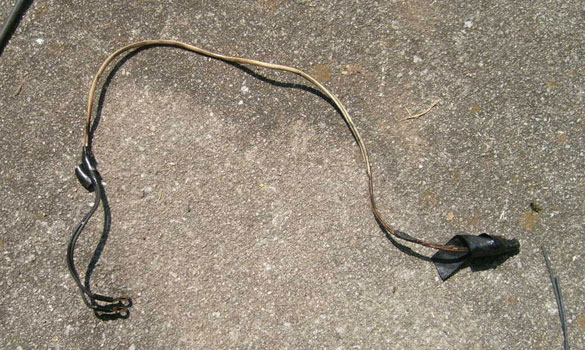
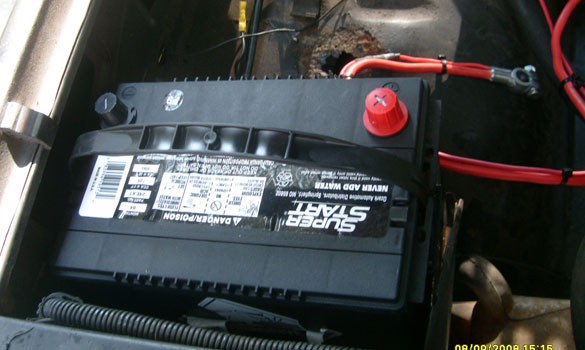
Next on the list was to tackle the electrics.  All the cabling that was done on this thing is pish.  Lots of vinyl tape and twisting.  I went through what I thought I could reasonably complete today and knocked a lot of it out.  I reworked the positive leads from the battery to the starter etc.  Did the same for the negative.  Then I wire tied it all into place as best I could.  Have you ever tried to solder 10 gauge stranded copper?  I have the highest wattage soldering gun I could find, and it wasn’t easy.  Heat shrink was also done.

Lots of this kind of thing in there.  There was bubblegum involved.

Lots of this kind of thing in there. There was bubblegum involved.

Cable ties!  Nom nom nom...

Cable ties! Nom nom nom...

New Battery

New Battery

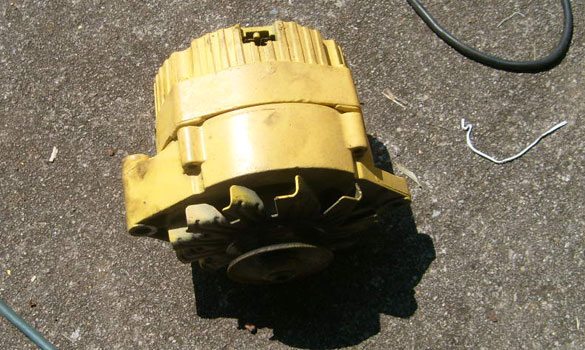
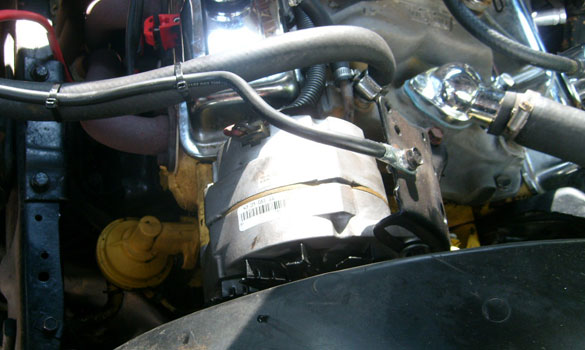
Next I tackled the alternator.  I’m not SURE it was bad, but come on.  It was rattlecanned yellow.  Got the lifetime replacement on the new one.  MUHAHAHA!

Yuck.

Yuck.

Yum!

Yum!

But the BEST part of the day was the fact that while I was working on belts, I tightened up the power steering belt and…. no more squeal!  I was really not wanting to spend any cash on a new pump, so that’s really good news.

I fired it up, and it looks like all my repairs held up.  It sounds pretty good at idle.  The gear slipping is getting worse though.  So vacuum wasn’t the issue.  Definitely in for some tranny work soon.

In the meantime, here is a little video of her purrin along!  For the record – there is now low end in the camera mic, so you hear a lot of the fan noise and not a lot of the rumble.  I’ll take a better recording sometime soon.  In person, it sounds great.  Man I love it….

embedded by Embedded Video

Incidently, if anyone knows what the two things in these pictures are, I’d love to know.

Passenger side on the firewall.

Passenger side on the firewall.

Driver side next to brake booster.

Driver side next to brake booster.

Categories: Project Log Tags:

Electricals Soon

August 8th, 2009 Comments off

Well, the big ones anyway.  I got a new alternator and new cabling.  Also a new battery.

Since I’m going to be rooting around under the hood a lot to get that done, I also went ahead and gave the engine compartment a quick spray of engine brite just to get the majority of the grime off.  I will also be adding towards the top of my priority list getting the nasty yellow cowling plate resprayed.  Yuck.  That’s going to be my first test of the chemical stripper.

Categories: Project Log Tags:

The Great Vacuum Mystery

August 8th, 2009 Comments off

So my transmission fix didn’t quite do anything.  Color me not surprised.  It still shifts the same – getting up to highway speeds and then shifting down.  I let James ride along to hear it – he says “Oh, that’s just your passing gear.”  Hmmmm….  I am dubious of that.  I’m going to have it serviced – I’m going to get it flushed, and have them install a new pan and gasket and fix the leak on the speedo cable.  I’m figuring I’m in for about $300 of work.

Oh but that isn’t the best part!  My vacuum lines are a complete mess, I come to find out.  In fact, a vacuum issue might be what is behind the tranny problem for all I know.  Here is the situation.  I have no PCV valve.  Plus the line that SHOULD go to the PCV goes to the brake boost.  I got some help from the guys on the forum and got it straightened out I think.

Here are some pics of what I faced…

Overview of engine.

Overview of engine.Passenger SideDriver Side

Categories: Project Log Tags:

Transmission Woes and the Dark Underside of the Truck

August 5th, 2009 Comments off

Got the truck back from SHA – they totally hooked me up.  Anyone who lives in the Knoxville area who owns an import (what they mainly work on) and needs a good mechanic should look them up.

They led me over to the alignment shop who got my wheels straight.  Pete’s Alignment – nice people.  All said and done the total front end work, including parts, labor, and the alignment was $280.  A far cry from the $800 Firestone quoted me.

I had forgotten my Garmin, so while the alignment place was working on the truck, I was getting directions to the office.  When I left, I followed the directions I had found and hit the interstate.  That is when I ran into an issue.  The truck kept deciding it wanted to be in a lower gear.  I’d be rolling along at highway speeds and suddenly it would shift down and the RPMS would shoot to 3k.  So I’d have to slow down or risk blowing the tranny.  After some experimentation, I figured out that if I let teh speed drop to 45 and kept it at 2k RPM, it would shift up.  Then it would hold the higher gear for a bit – followed by another swift and scary downshift.

James diagnosed it as a vacuum issue (he’s had something similar happen before) so I replaced the rubber components of that vacuum line and the vacuum modulator.  It started and moved up the driveway fine, but I have to take it out for a spin to be sure if that has it fixed.  In the process, I discovered that the screw that holds the modulator in had been over torqued like crazy and the hole was stripped (it is part of the housing).  Fantastic.

But there were more interesting finds under there!  Ha ha!  😐

First of all, I knew it leaked oil – I just didn’t know it was THIS much oil.  The oil was full when I got the truck home – it now has about a 1/4 quart.  Also, it leaks ATF like crazy.  I should mention here that a rebuilt transmission would set me back $2k.  Not something I want to do right now.  Hopefully it can kick along till I get this bodywork done.  Or I guess I could rebuild it myself…  No.

Anyway – other fun stuff underneath: there is a weird bit of sheet metal all twisted under there.  Not sure what it is for.  The ebrake cable looks like it was hung with coat hanger – but that could be stock.  The speedo cable is leaking really badly.  In fact, it seems like many of the things done to this truck in the past were done incorrectly.

Well, I’ll find out more tomorrow.

Categories: Project Log Tags:

Shift Indicator, Window Handles, Wipers

August 5th, 2009 Comments off

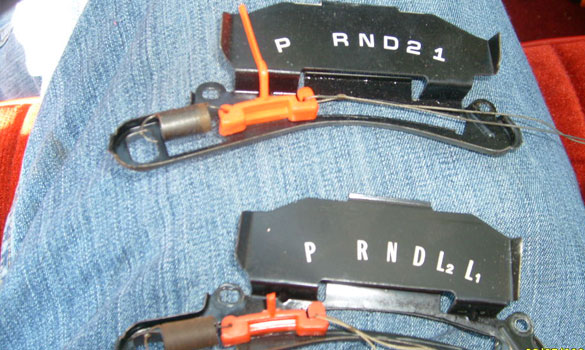
I replaced the shift indicator finally.  It was easier than I had expected.  Took of the dash bezel, took off the old indicator, rebuilt it with the needles and spring from the newer one, and put it back on. I had to manufacture a post for the wire that connects the indicator to the shifter – the original post is long ago broken off.  I made it out of some UHMW, so hopefully it won’t snag anytime soon.

I also got new wipers, and new window handles.  I can finally roll my window down without struggling with the knobless stick that I’ve been using.  I also replaced the lock knobs because the ones I had were broken.  Picked up a new air filter, oil filter, gas filter and fresh ATF and oil but I didn’t have time to get to that tonight.  James was working on his truck and we had the place get give us the wrong starter, so we ended up burning a lot of time.  I’ll get to it later.

Old and Bustexd and New Hotness

Old and Busted and New Hotness

Categories: Project Log Tags:

Manuals Have Arrived!

August 5th, 2009 Comments off

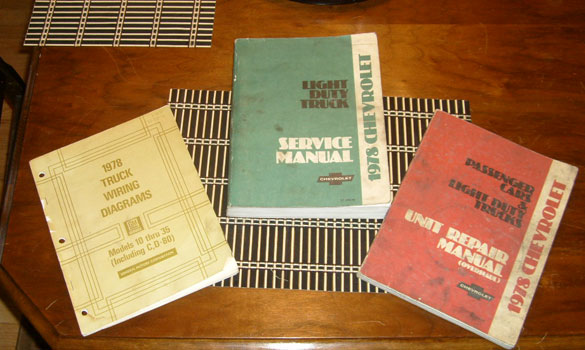
The manuals came!  Actually, they came a couple of days ago, I just hadn’t had a chance to go through them.

But I’ve given them a once over now – very cool.  Very in depth.  Worth the $40 I paid for them.

Unit Repair, Wiring, and Service.

Unit Repair, Wiring, and Service.

Categories: Project Log Tags:

Paint Booth

August 3rd, 2009 Comments off

Lunch finally!

I went ahead and ordered my new body panels – though two of them will not be going on MY truck.  James has graciously agreed to let me to test my hand on his Cheyenne!  I’m grateful for that, as I know practice is the one thing I need, and we have the same body panels.  We will be replacing his floorpan and cab support – two of the same areas I will have to repair on mine.  He is a brave soul….

I also ordered some brushable rust converter and some seal sealer.  (Also I couldn’t help myself and I ordered my tail lenses!)   I figured we’d do the test welding on his truck, then if it works out ok I can head out to Royce’s and do mine there.  Course, that means I’ll have to clean it up and primer it and all – but that’s no big deal.  Hopefully I’ll be an old hand by then and get the welding done quickly leaving time for the other bits.

I also plan on starting one of the doors soon.  Probably the driver side.  I’m going to take it apart, strip it, sand off any rust, treat it with convertor, and then smooth everything out reeeeeealy well.  Then primer it and put it back together.  This is all part of my “Restoration by Attrition” concept.  Work on each peice a bit at the time and get it in top shape (or as close as I can) for paint.  Then when it comes time for paint, all I’ll have to do is a little gapping and some touch up and I’ll be ready to roll!

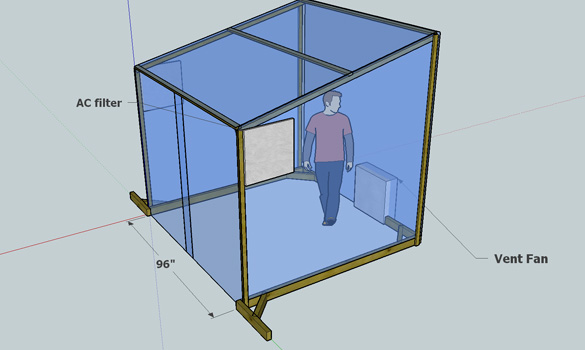
Doing all that primer though means I need to use real auto primer – which means I need a compressor, a gun, and most importantly – somewhere to paint.  So I’ve designed a little paint booth that I can put up and take down quickly.  I’ll make it out of 2×4’s and 1×2’s and some clear heavy drop-cloth plastic.

This was actually Amanda's idea (when I complained I had nowhere to paint)

This was actually Amanda's idea (when I complained I had nowhere to paint)

Categories: Project Log Tags: