Archive

Archive for August, 2009

Mystery Panel

August 26th, 2009 Comments off

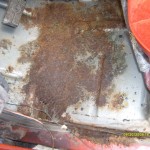
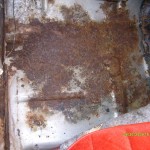
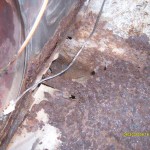
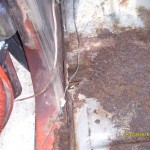
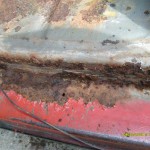
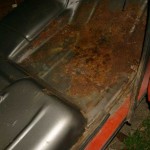
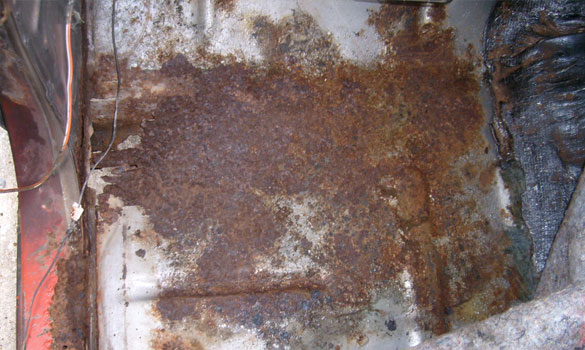
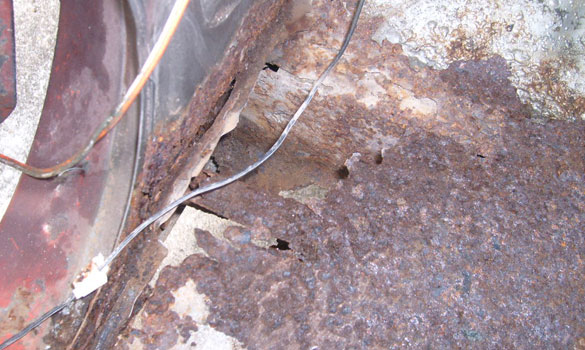
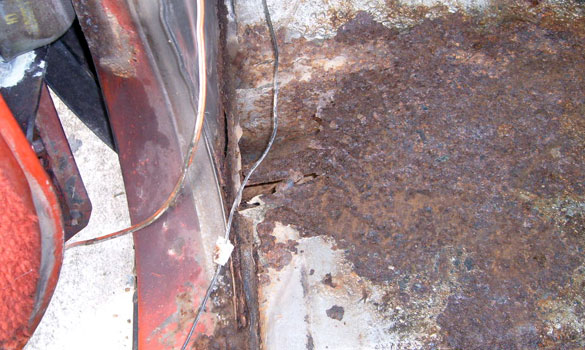
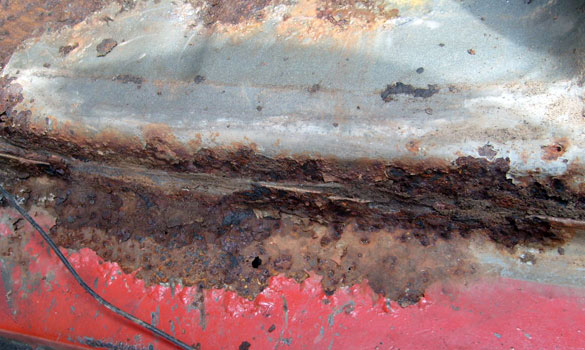
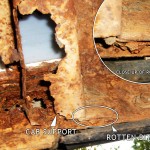
So I shot an email off to the guy who owns the store that I will be buying all my patch panels from (guys is really nice too – very cool).  It was in reference to a rotten bit of metal that is in the whole “rocker/floor pan rot” zone that I have been obsessing about.  It is just forward of the cab support pillar, and seems to be between the forward section of the inner rocker and the cab support.  I think it might be the lower part of the a-pillar, but I can’t really tell.  I also can’t tell if it can be repaired, or if it needs replacing.  I probably won’t know until I get the rockers and fender off.

Hopefully he will tell me what part it is and if it has a replacement part available.

rottenbit

EDIT 2014 Update:
For the record, this is a combination of the cab support, kick panel and floor pan.

Categories: Project Log Tags:

More Adventures in Rust

August 25th, 2009 Comments off

Well, I got good news and bad news.

First the bad news: A lot more of this truck is rust than I first thought.

The good news: I don’t care.

I’ve noticed something about what makes a fix on the truck successful, versus what makes one seem hopeless.  The “really knowing what it is exactly” factor is what I’m calling it.  It seems that whenever I start a little project on the truck (like he door pins, for example) it always turns out to be waaaaay more time consuming than I thought at first blush.  That is because I haven’t been REALLY looking at a problem before I dive in.  When I DO take the time to really strip everything out of the way and really get a good look at what I’ll be working on, that seems to be when things go really well.  So from now on, that is my goal: to not get surprised by the work load.

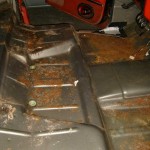
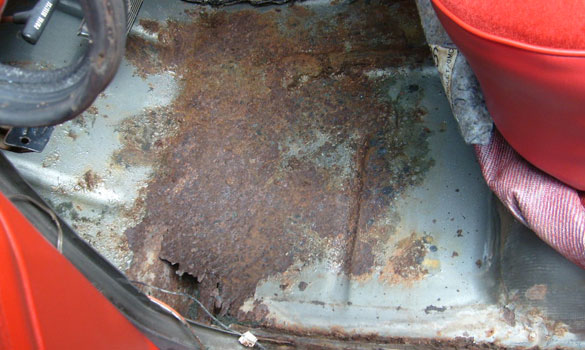
So back to the rust.  There is a lot of it.  I first took out the seats, seat belt bolts, and the various trim pieces holding down the carpet… by the way, if you ever decide to do this, I cannot stress enough how much you need a 9/16ths box end and a huge star bit for getting the seat bolts and seat belt bolts off.  Critical.  I had neither.

After the seats and other stuff was out, I stripped up the carpet and nasty moldy soggy under pads and what I assume is rotten Hushmat.  I threw it all out.  When all this is said and done, I will have a Rhinoliner type coating instead of carpet.  After I got out the carpet, I got a good long look at the situation.

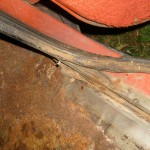
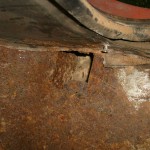
The short of it is this: there is damage that will have to be fixed via cutting and welding in the following panels:  Both inner rockers, both outer rockers, both floor pans, the driver side cab support, both a-pillar bottoms, the driver side footwell.  I will possibly have to repair the passenger side footwell.  It wouldn’t surprise me.   Now the good news its this: I will not have to replace these panels in their entirety.  I can salvage a vast majority of both the inner and outer rockers on both sides – I’d say 60% or so –  and I think the passenger side cab support can be salvaged.  Of course, I’ve never actually done this, but I’ve done it many times in my head.  I have no doubt that I can cut, shape, and fit what I need to.  Welding is the only bit I’m worried about really.  But I guess this will be good practice.

I’m really really glad I will be able to keep most of the rockers as that will help line everything up a LOT.  the bottom of the a-pillars is going to be a bitch.  I’ll just have to wing it I suppose. Also fun: I will have to drop the fuel tank to do this.  But it is full of rust and needs replacing anyway.  I’ll do that at the same time.

All in all I think I’m looking at $750 or so in materials (that includes paint, discs, wire, primer, paint, liner – pretty much everything but the electricity).  My estimate is that it will take 5 full days.

As soon as I have the funds, I will begin.
rust2
rust3
rust4
rust5
rust6
rust7
rust8
rust9
rust10
rust11

EDIT 2014 Update:
I ended up having a guy do this welding work. I’ll post more on my update on that post.
Categories: Project Log Tags:

Rust-B-Gone!

August 24th, 2009 Comments off

I wrote this last night, but just realized I had never hit the publish button.  Sorry about that.  But here it is….

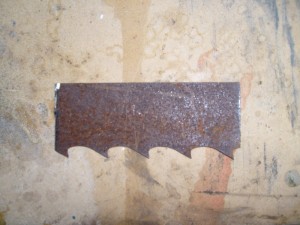
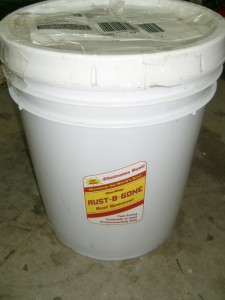
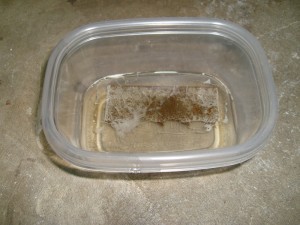
My five gallon bucket of Rust-B-Gone came while I was out of town.  So I decided to do a little experiment.  I took the rustiest thing I had (other than the truck) which was a very very old bandsaw blade and put it in a container of Rust-B-Gone.  It is about as close to magic as I think I’m going to get.  90% of the rust was gone after 10 minutes.  I did NOT hit it with a wire brush or clean it in any way before putting it in the Rust-B-Gone.  I just cut a section and threw it in.

MAN this stuff is cool.  When I opened the bucket I thought it smelled familiar.  It smells a whoooooole lot like the muriatic acid we use at the knife co-op to etch pattern welded blades.  It is about the right color too for a seriously diluted mix.  I may have some more experimentation to do to find out if that is the case.

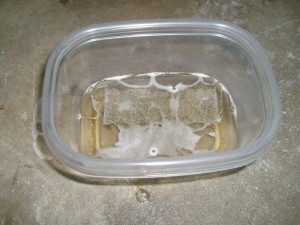
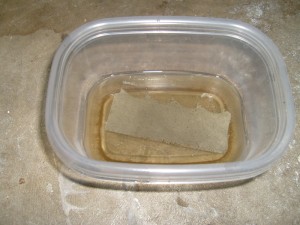
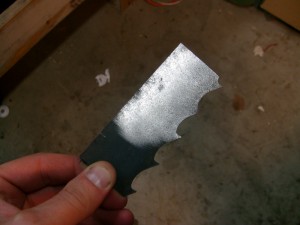
Anyway, after 5 minutes a vast majority of the rust was gone.  After 10 (as mentioned) almost all of it was gone.  After 30 it looked pretty darn clean.  So I took it out and washed it and dried it off.  As soon as you take it out of the solution, it gets a thin black oxide layer on the surface.  But it is about the consistency of candle soot, and a very quick pass with the wire brush makes everything gleam.

I’m going to try the roll-on application later in the week.

This is the rusty blade I'm testing

This is the rusty blade I'm testing

5 gal bucket of awesome.

5 gal bucket of awesome.

Rusty blade in the Rust-B-Gone

Rusty blade in the Rust-B-Gone

Rust-B-Gone after 5 minutes

Rust-B-Gone after 5 minutes

Rust-B-Gone after 10 minutes

Rust-B-Gone after 10 minutes

Rust-B-Gone after 30 minutes

Rust-B-Gone after 30 minutes

Out of the Rust-B-Gone and washed.  Black oxide formed.

Out of the Rust-B-Gone and washed. Black oxide formed.

After a quick swipe with the wire brush.

After a quick swipe with the wire brush.

Categories: Project Log Tags:

Floorpan Rust

August 20th, 2009 Comments off

Woo hoo!  I have the welding task cut out for me.  Glad I’ll be getting a new floor pan and rocker panel in the mail soon.  I’m gonna need em.  By the way, if you are looking for the absolute best place to get panels, you will find the best service and prices at: Mike’s Bump and Grind Garage.  That is where I ordered a majority of mine, and they are awesome.

floorpan_rust1

floorpan_rust1

floorpan_rust1

floorpan_rust1

floorpan_rust1

floorpan_rust1

Categories: Project Log Tags:

Little Things, But Major Annoyances

August 19th, 2009 Comments off

I knocked out several of the little things that annoy me in the truck this week.

1) Ignition – It stuck.  Badly.  Like to where I had to really twist the crap out of it to get it to disengage the starter.  So, I went to O’Reilly’s and got a new ignition cylinder.  Got it back home, cracked the Haynes manual open and started the dis-assembly.  But none of the pictures in the book looked like what I was seeing.  The description didn’t match either.  It talked about an “ignition cylinder retaining screw”, which my column most certainly lacked.  Nor did it have a tell-tale hole where one might have been.  Only when I looked back to the “earlier models” section did I find instructions that worked on mine.  Needless to say, the cylinder I bought didn’t work, so i had to run and exchange it for a new one (turns out my column is from a ’76).  The old one had bits of spring jutting out all over the place.  Looked very broken.  But the new one slid back in and I got everything back together and it works great now.  Bonus: I had to fashion a tool to complete this job.  There is a plate that sits between the steering wheel and the rest of the steering column.  It is called the “lock plate” apparently.  That plate has to be removed to get to the release for the ignition cylinder.  That plat, however, has a very large spring behind it.  There is a little lock ring on the shaft that hold the plate back.  So to remove it, you first have to press that plate down FURTHER so that you can get at the small, slippery, stubborn lock ring.  So I create a U shaped bracket.  It had a hole in the center large enough to pass over the shaft.  Then I tightened down the nut on the shaft, which then pushed the bracket, which then depressed the lock plate, which then allowed me to get the lock ring off.  This took about 5 hours to figure out.  And I now have a tool I’m likely never to use again, but that worked PERFECTLY this once.  That makes me happy.

2) Vent Window – Brian helped me with the vent window.   Took about 30 minutes to find the perfect set of movements to wrench it out of the  door.  Good news: the interior of the door looks fantastic.  Very little rust.  Plus, the new vent window from pull-a-part went in perfectly.  I now have airflow!

3) Door Hinge Pins and Striker – This took a looooong time.  I had to do it by myself.  I ratcheted off the hinge bolts and came to the panicked discovery that the door weighs forty million pounds, or there abouts.  So I had to hold it up with one arm while I took the rest of the bolts off and then catch the thing.  Some lower back damage later, I had it safely on the grass.  I then had to cut the old hinge pins out, clean everything up and re-grease, then put the new pins and bushings in.  Then I had to build a scaffold to set the door up while I bolted it back into place.  Then I installed the new striker.  It closes like new now!  No more slamming it shut!

The fuel thing is really bugging me.  It only seems to have a problem RIGHT when you start it, and after you’ve been driving it a good while.  But good news –  a new tank is only $100, so that is on the list now.  Bad news: my fuel needle sits on half a tank now no matter what.  I have no idea why.

I also got a good look under the carpet on the driver side.  And saw the ground.  Hopefully the new floor pans get here soon, cause I’m wanting to get that done.

EDIT 2014 Update:
I’ve ended up completely rebuilding the vent windows. It is pretty much required on these trucks, but it wasn’t horribly complicated. I have brand new door shells and new hinges, so all of that will be getting fixed. I never could get the old ones to work right anyway.

Categories: Project Log Tags:

New Tranny Rocks, But Fuel Problems

August 15th, 2009 Comments off

Got the truck back from the transmission shop.  I also had them check the timing and whatnot.  They said my plugs and wires were still good, but that my timing had been off.  The total bill for the rebuild, shift kit, and timing was $1100 which is a lot better than I thought it would be.

I was a bit disappointed though – on the way home it was STILL doing the “stall/trying to die” thing (which I noticed it doing on the way to the shop in the first place).  At first I was sort of pissed because I thought “Surely they noticed that.”  But then I made a connection – it only seemed to be doing it on hills.  By the time I got past the hills and on the flat stretches on the way home, it was doing ok.  Then after parking on the (very inclined) driveway for a while, I started it up.  Idled ok for a minute, then started to really get rough.  After asking for some advice on the forums and from my buddy Dan  I decided to get a new fuel pump ($40) and a new, higher flow in line fuel filter.

Boy howdy.  THAT made a difference.  Started right up and Brian and I took it for a spin.  Did great.  I thought I detected a little hesitation once or twice, but nothing major.  And that could have been my imagination.

The new tranny is teh roxxors.  If I come to a complete stop on a flat and then floor it, it smokes the tires.  A lot.  I was quite pleased.

So Tranco MIGHT turn out to be ok.  But there are three things that make me hesitate to say “they have my business”.

1) I shouldn’t have had to figure out the fuel pump thing on my own.  They should have caught that.

2) The tranny is COVERED in ATF.  I’m going to degrease it tomorrow and see how it holds up.

3) Ok, so I JUST finished redoing the wiring.  And I had both leads going off the back of the battery towards the firewall.  When I got the truck back and opened the hood for the first time I immediately noticed that the hot was going sideways, towards the driver side.  Not a big deal, it had just been rotated 90 degrees.  In fact I remember saying “I wonder what they had to disconnect the battery for.”  Well when I took the hot off tonight to get it out of the way while I took out the fuel pump, the frikken post clamp was cracked clean in half!  Now, you could tell it was just a defective part.  And I didn’t even notice anything wrong until I unbolted it from the post – so probably the guy never even noticed that it cracked when it went on.  But I couldn’t help but cut my eyes and wonder if he had done it and just said “his problem now.”  Man I hope not – cause he see mes like a real nice guy.

Anyway.  I’m outta truck money for now – gotta get caught back up after dropping all the cash on the tranny.  But hey – it runs now!  And well, too.  So for the next little bit, it will be only labor investments – and I have one planned for tomorrow.

I am bound and determined to fix the sticky ignition.

EDIT 2014 Update:
The tranny rebuild turned out to be crap actually. I put less than 200 miles on it before it had filled the pan with brass shavings. I chucked the th350 for a street build 700r4 when I did my engine swap to get the overdrive. I still haven’t really “run” it on that new tranny, so I don’t know if that was a good move or not, but I hope it was.

Categories: Project Log Tags:

Update on Mystery Parts

August 12th, 2009 Comments off

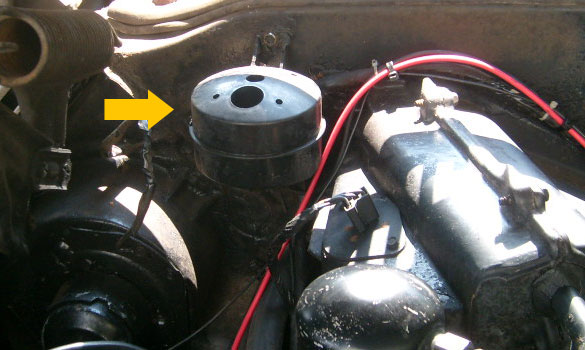
Turns out this thing:

Passenger side on the firewall.

Passenger side on the firewall.

… is the “vacuum reservoir” for the AC unit.  The AC is mostly gone from the engine compartment.  I’m leaving it on the firewall, but I disconnected it from the vacuum line.

EDIT: Also called the “accumulator ball”.  Ok, disconnecting that turned out to be a bad idea.  Even with no AC, you still need that line to operate the vent controls.  Without it, the various selection controls do nothing.  Took me 7 months to figure that out, sadly.

EDIT 2014 Update:
I now have aVintage Air system that does away with all the vacuum components. So I have now removed the accumulator.

Categories: Project Log Tags:

Tranny Rebuild

August 12th, 2009 Comments off

Took her into to Tranco.  I was a little dubious – I had heard good things and bad things.  I talked to the guy there about my issue, and after some discussion it looks like the best option is a rebuild.  I’d have to do that eventually anyway.  I had done some price checking on the web and rebuilds on a TH350 look to cost anywhere from $250 to $2500.  That huge difference mainly centers around the “I know a guy” factor vs. reputable shop, and how much they have to actually do.  I could get a new (reman anyway) TH350 for around $1400, but then I’d have to pay shipping and installation.

But after getting it to the shop (it tried to die most of the way) and talking to them, I felt like I had made about the safest decision I could have.  The guy I talked to is a Chevy guy – used to do late 60’s early 70’s hotrods and whatnot, which makes me feel a little safer.  I also talked to him about shift kits, and he offered to do the modifications as part of the rebuild at little cost, so that’s fantastic.  I’m going to get the whole reman, with shift kit, for under a grand.  That’s good for the budget.  Other good news: the Chevy guy is the mechanic too (not specifically a tranny guy), so I’m looking to have them do the tuneup as well.  I feel pretty good so far because he gave me that first quote with the caveat of “if all the hardparts are ok”.  So I half expected to get the “we have to replace all your hardparts” call, because I know a lot of places pull that crap.  But when we talked he said that it was ok except for the pump (which I expected) and a bushing.  Well, I’d call that pretty lucky!  So I get the feeling that they are being straight with me.  I’m think part of that might be that they know that I’m doing a resto – and if they don’t screw me over, they will probably get a good bit of business out of me.

I really hope these guys turn out to be good – they are less than 2 miles from the house and that would make my life a lot easier.  Plus they like American cars – I really like SHA, but I know they focus on imports.  They came out and said there would be some stuff they couldn’t do for me.  Plus they are waaaaaaay far from the house.

Hopefully I’ll have a well running truck by Monday!  One can always hope.

EDIT 2014 Update:
Yeah, don’t go to Tranco. It leaked since the day I got it back until I got rid of the thing. It also filled the pan up with a nice layer of brass dust, though admittedly it could have been that they never cleaned the old pan out. Either way, crappy job.

Categories: Project Log Tags:

Lots of Work Today – No More Steering Squeal!

August 9th, 2009 Comments off

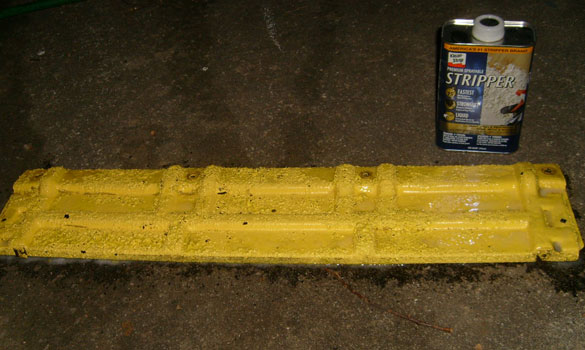
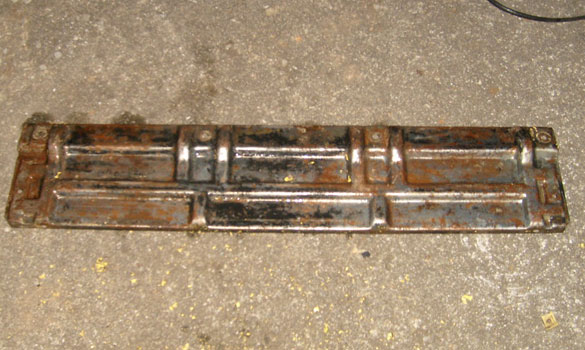
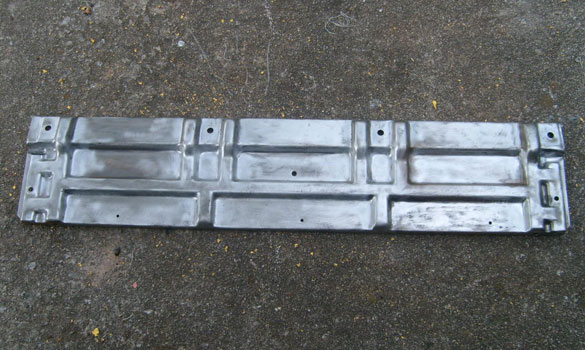
I got a lot done.  Part of it last night, but most of it today.  I got the yellow cowl plate clean!  First I chem stripped it, then I applied rust converter.  After the rust converter cured, it was apparent that the rust converter wouldn’t really work, so I wire brushed it all off down to the bare metal.  Took hours.  Shot it with some primer and Rustoleum and it looks a lot better:

Mmmm...  chemicals.  I wore a mask, goggles and gloves.

Mmmm... chemicals. I wore a mask, goggles and gloves.

After the chemical strip.

After the chemical strip.

After wire brushing.

After wire brushing.

Repainted!

Repainted!

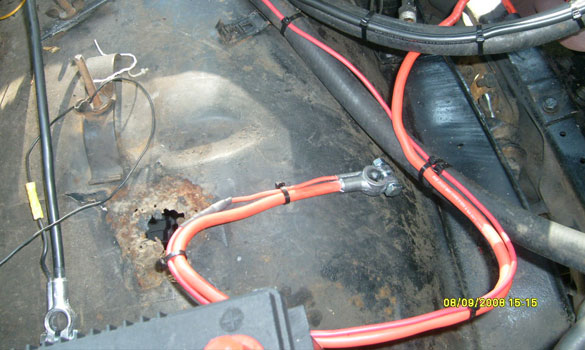
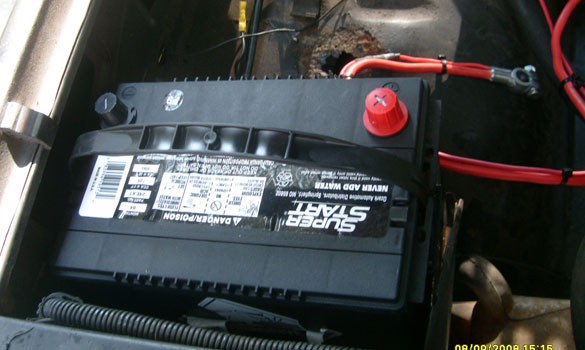
Next on the list was to tackle the electrics.  All the cabling that was done on this thing is pish.  Lots of vinyl tape and twisting.  I went through what I thought I could reasonably complete today and knocked a lot of it out.  I reworked the positive leads from the battery to the starter etc.  Did the same for the negative.  Then I wire tied it all into place as best I could.  Have you ever tried to solder 10 gauge stranded copper?  I have the highest wattage soldering gun I could find, and it wasn’t easy.  Heat shrink was also done.

Lots of this kind of thing in there.  There was bubblegum involved.

Lots of this kind of thing in there. There was bubblegum involved.

Cable ties!  Nom nom nom...

Cable ties! Nom nom nom...

New Battery

New Battery

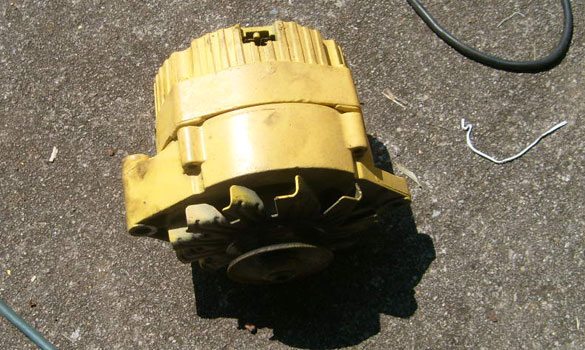
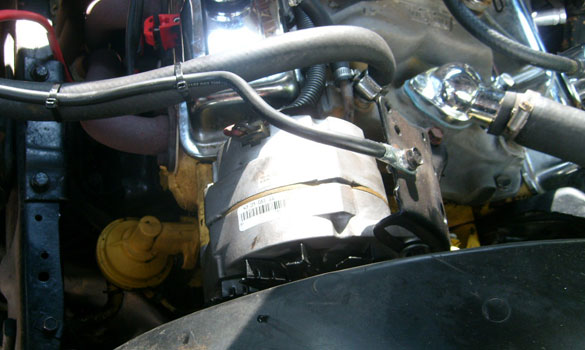
Next I tackled the alternator.  I’m not SURE it was bad, but come on.  It was rattlecanned yellow.  Got the lifetime replacement on the new one.  MUHAHAHA!

Yuck.

Yuck.

Yum!

Yum!

But the BEST part of the day was the fact that while I was working on belts, I tightened up the power steering belt and…. no more squeal!  I was really not wanting to spend any cash on a new pump, so that’s really good news.

I fired it up, and it looks like all my repairs held up.  It sounds pretty good at idle.  The gear slipping is getting worse though.  So vacuum wasn’t the issue.  Definitely in for some tranny work soon.

In the meantime, here is a little video of her purrin along!  For the record – there is now low end in the camera mic, so you hear a lot of the fan noise and not a lot of the rumble.  I’ll take a better recording sometime soon.  In person, it sounds great.  Man I love it….

embedded by Embedded Video

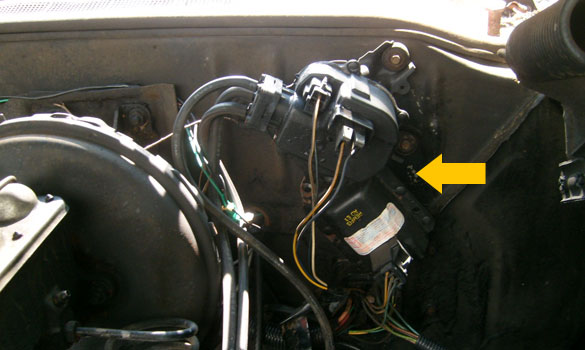
Incidently, if anyone knows what the two things in these pictures are, I’d love to know.

Passenger side on the firewall.

Passenger side on the firewall.

Driver side next to brake booster.

Driver side next to brake booster.

Categories: Project Log Tags:

Electricals Soon

August 8th, 2009 Comments off

Well, the big ones anyway.  I got a new alternator and new cabling.  Also a new battery.

Since I’m going to be rooting around under the hood a lot to get that done, I also went ahead and gave the engine compartment a quick spray of engine brite just to get the majority of the grime off.  I will also be adding towards the top of my priority list getting the nasty yellow cowling plate resprayed.  Yuck.  That’s going to be my first test of the chemical stripper.

Categories: Project Log Tags: