Archive

Archive for the ‘Project Log’ Category

Homer’s Body Shop

December 17th, 2009 Comments off

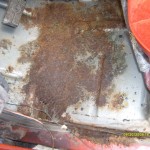
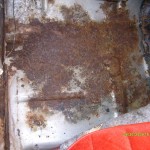
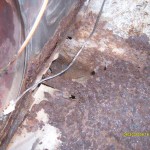
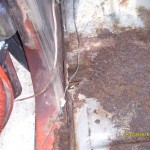
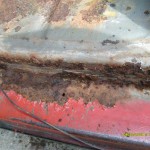
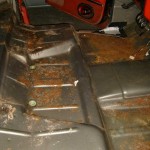
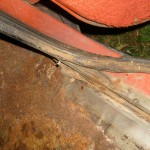
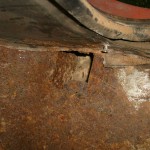
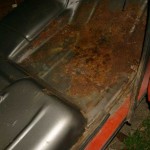
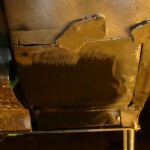
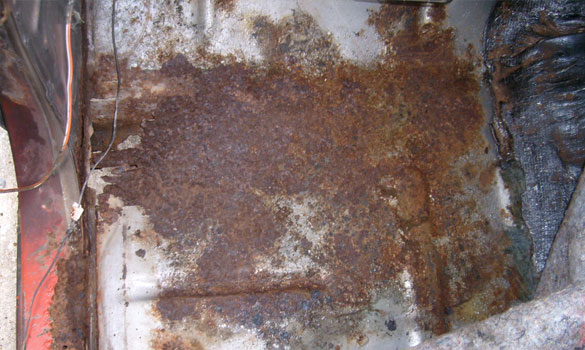
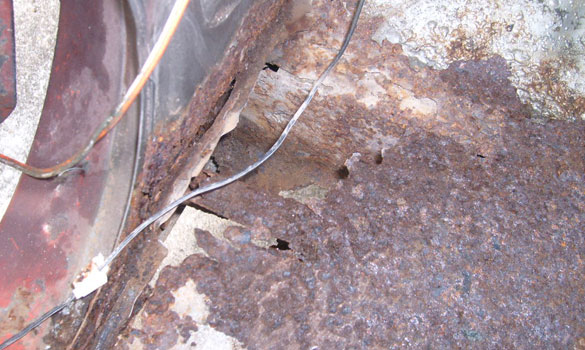
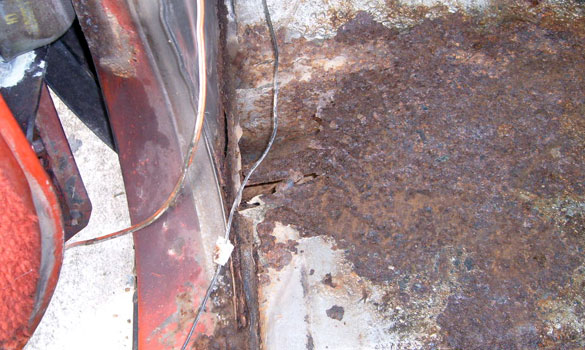
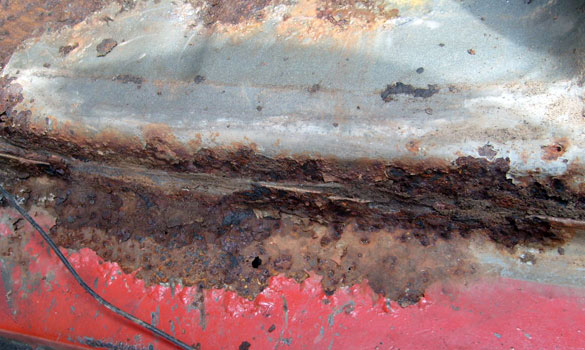
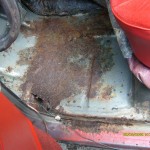
Homer’s is where I’m getting the welding done.  Mike there has been working on the panel replacement, and took some pictures.  I’m going to post them up here.

Also, we chatted about future paint options – he gave a very reasonable price!  I just have to decide what the hell I’m going to do for sure.  Cause I REALLY want to learn to paint, but…  I’m just not sure I’d ever actually get around to it.  At any rate…

Looks like it is coming along nicely!

EDIT 2014 Update:
This turned out not to be such a good move. It was a disaster. This is not a case of “oh the customer is picky” – The inner rocker literally fell off in my hand. It wasn’t even tacked on, it was just stuck up with seam caulk. Cosmetically, I wasn’t too concerned since it will be under carpet, but it was an absolute crap job structurally too. Live and learn. It will have to be redone someday.

Categories: Project Log Tags:

Surgery Begins

December 13th, 2009 Comments off

The panels are being worked on finally!  I took it in last week with all the replacement panels piled in the bed.  He is doing BOTH rockers and floorpans – so it should run ~$800, which I feel is a really good price.  I saw what he was working on while I was there (it was in primer) and you can tell he is good.  The truck is in good hands!  He is welding them in now and should have it done by Monday or Tuesday.  Very excited!  He sent me some pictures of the teardown with the doors off and whatnot.

You know, I had thought to move on to the interior right away, but now I’m thinking it would be smarter (if conditions allow) to go ahead and tackle the doors.  It would involve getting the air compressor, primer, and gasket set.  And that would be around $600 and then $150 per door.  But it would make the thing a loooot more livable.  And it would decrease the risk that this fresh work will get wet.  Also around the same time, I will have my body expert fix the dent in the driver door (if I give up on the idea of doing it myself!)  and get those awful mirrors swapped out.  Something to chew on.  In the meantime I can dream about what shes going to look like sans rust!

EDIT 2014 Update:
Yeah, the guy had bondo skills. That much is true. In the time that he had my truck though, his drunk helper stole my license plate because his car had no tags and the guy had what I can only assume was a blind ferret weld things together. Total disaster.

Categories: Project Log Tags:

Dash Pad

December 2nd, 2009 Comments off

I have lots of fun plans for the interior restoration.  The grand scheme includes spraying the interior floor with bedliner, creating LED lighting (classic lighting – not like ground effects or anything), paint, gauges, and dashpad replacement.  Lots of work.

Eventually, I want to get an actual replacement for the dashpad, but for now I figured I would try to repair it.  That turned into a huge process.  After some experimentation, I finally ended up cleaning up the edges of the cracks, sanding the whole surface to get all the old dirt paint and grime off it, and then filling in the low spots with Loctite 5 minute epoxy.  Why 5 minute epoxy?  Because it always remains a little flexible.  It never gets really really brittle.  So I did it in thin layers.  It took days.  Lots and lots of mixing, leveling, and sanding.  Then I sprayed the whole thing with truck bedliner.  It ended up looking ok – not great, but much better.  In retrospect what I should have done was get everything level, then cover all the surfaces with contact cement and rip-stop nylon.  Then covered THAT with a heat resistance thick latex paint (or bedliner).  The issue is that though the surface is very even now, the cracks most likely will reoccur on the edges of the epoxy repairs.  A layer of rip-stop would prevent that.

If you are doing this kind of repair yourself, that is seriously what you should do.  Level everything out with epoxy (or better yet, that rubber bumper repair stuff), then cover it.  THEN spray it with bedliner or whatever.

Of course, for all I know this thing is going to turn into a cancer inducing gas emitter as soon as it gets hot in the cab.  So do it at your own risk.

I also did some major changes to the vent and nameplate assembly that screws into the dash.  The dash in my truck had been salvaged out of another truck – one that didn’t have AC.  Mine does (and it will be made to work again some day!).  So I needed a plate that had AC holes that weren’t cut out with a pair of tinsnips.  So I got a donor from pullapart and used some body filler to fill in the old nameplate slot.  I resprayed the AC vents, and resprayed the assembly (it still needs a couple of coats)  Now for the cool bit – I got a bowtie off an old Lumina and a chevy nameplate off an old cavalier and repainted them – I’ll be mounting them on the assembly in lieu of  the original Silverado nameplate!

I also started the experiments with the instrument cluster.  I think I will most likely repair and replace the original gauges rather than try to create a whole new cluster.  But I do plan on two major modifications.  I am going to remove the leftmost gauge mounting locations (the non-working clock and the voltmeter).  I’m going to then use that space to mount the tach, which is currently mounted on the dash.  I’ll also replace the non-working temp gauge.  It will involve some fabrication, but not too much – most of it will be wiring.  I’m not going to keep the voltmeter.  I’ll throw a multimeter into the glovebox or something.  I’d also like to keep the oil pressure gauge if I can somehow, but I’m not sure how I’ll do that yet.

I already started by cleaning the gauges up and repainting the needles.  I will be replacing the plexiglass face also.

I will also be redoing all the dash lighting with LEDs (I ordered over 200 from China for like $4 – high intensity red and high-intensity white).

I’m going to try a new gallery out with this post.  I’m including images from the various things I’ve been working on…


EDIT 2014 Update:
This approach didn’t actually work. The epoxy cracked almost immediately. I ended up sanding it and fiberglassing the whole thing. I think it would have come out really cool, but unfortunately it is still MIA at the painter’s. So instead I’m just going to order a new one. At the original time of this post, they were about $500 but since then they have come down to $180.

Categories: Project Log Tags:

New Stuff

October 14th, 2009 Comments off

Been very very busy lately and I haven’t gotten nearly as much done on the truck as I had hoped.  But a lot has happened!  So I’m going to spread it out over a couple of posts lest it end up being six pages long. First things first:

The welder looks like he is going to work out perfectly.  In fact, I already have all my panels and I’m ready to take him the truck – I just haven’t had the time to do it yet.  Funny thing happened on the way there, though.  I had been working extensively on the electrics under the dash – rigging up some new lighting for the instrument cluster (more on that later).  All the dash items were working fine when I got done – I swear.  I got up early to take it over to the welder and see what he thought.  I started her up and headed to the highway – which requires a turn or two.  Yeah, that’s when I noticed that the blinkers weren’t working.  About 15 minutes later I realized the windshield wipers weren’t working either.  Ha ha!  Excitement.  So I made the hour long journey with clinched butt cheeks praying that it wouldn’t rain (which it seriously looked to be wanting to do).  I got there and he looked it over and gave me an estimate – $600.  Sounded good to me – so I said I’d be calling him soon.  I then spent an hour being chased by a rain cloud on the way back.  It caught up with me about a mile from home – but I squinted a lot and made a distressed face to protect myself, so I made it ok.

Somehow – and I’m really unclear on this – I managed to fry like 5 of my fuses.  They pass a continuity test fine, and their resistance is fine – but for some reason they weren’t working.  I replaced them and everything is good now.

It was exciting at least.

Next post: dash pad restoration.

EDIT 2014 Update:
So the welder ended up just kind of slapping the panels in there. It was a horrible job. I don’t mean “it looked bad” (which it did) but it is structurally unsound. Recently, the backplate of the inner rocker literally came off in my hand. I’m not going to fool with it right now because I just can’t face getting further behind the eight ball. It would require totally redoing those panels. Honestly, it is beyond my skill level. I will address them in a few years when I repaint the truck.

Categories: Project Log Tags:

Found a Welder! (Hopefully)

September 11th, 2009 Comments off

Been a while since I posted – but I was getting this new domain set up and my content transferred.

So updates:  Patch panels.  Well, I tried to do a cab corner.  It was really bad:

cabcorner1 cabcorner2

So I decided maybe it was a better idea to have someone do it for me.  Someone who is a little better at welding.  After some digging, I found a shop in Lenoir city that is willing to take a look.  I’m taking it there tomorrow to get a quote.

In other news, I snagged a new lower grille panel (the part behind the bumper – mine was bent quite badly), new headlight fixtures, some more headlight trim, and most importantly an INTACT original grille!  The headlight trim turned out to have a dent in it – so I’m still on the lookout.  But I’m stoaked to have the grille.

I did have a bit of an accident while at the pull-a-part getting all this stuff.  I sat up while under the donor truck and clipped the top of my head on the bumper guard, earning myself a deep gouge and lots of blood.  Fortunately, my fearless brother was on hand and helped me gather up all my stuff and sneak out of there before they noticed – otherwise the day would have been much longer.  We drove home, then over to the clinic and I got it glued up.

bhead bhand

I also got the stereo kind of working.  It needs new speakers – but I ran all new wiring while I was under the dash re-wiring some other disasters the PO left me.  So it has the proper leads, and 16 gauge wire running to the speaker locations.  A new set of 6x9s and some woofers and I’m in business.  I probably need a new head unit.  I got a $50 cheap-o, but it ran all of 1 minute before dying.  So the old one is in it now.

I’m currently finding really really small bits that I can spruce up for something to do.  The big work (paint) is out of my financial reach at the moment- so I’m doing things like painting the ashtray.  Hey – every little bit right?

This weekend I’m going to start taking a look at the dash and see what I can do in the “free” area there too.

EDIT 2014 Update:
Having the welding done by the person I choose ended up being a huge mistake. Should have tackled it myself.

Categories: Project Log Tags:

Mystery Panel

August 26th, 2009 Comments off

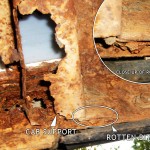
So I shot an email off to the guy who owns the store that I will be buying all my patch panels from (guys is really nice too – very cool).  It was in reference to a rotten bit of metal that is in the whole “rocker/floor pan rot” zone that I have been obsessing about.  It is just forward of the cab support pillar, and seems to be between the forward section of the inner rocker and the cab support.  I think it might be the lower part of the a-pillar, but I can’t really tell.  I also can’t tell if it can be repaired, or if it needs replacing.  I probably won’t know until I get the rockers and fender off.

Hopefully he will tell me what part it is and if it has a replacement part available.

rottenbit

EDIT 2014 Update:
For the record, this is a combination of the cab support, kick panel and floor pan.

Categories: Project Log Tags:

More Adventures in Rust

August 25th, 2009 Comments off

Well, I got good news and bad news.

First the bad news: A lot more of this truck is rust than I first thought.

The good news: I don’t care.

I’ve noticed something about what makes a fix on the truck successful, versus what makes one seem hopeless.  The “really knowing what it is exactly” factor is what I’m calling it.  It seems that whenever I start a little project on the truck (like he door pins, for example) it always turns out to be waaaaay more time consuming than I thought at first blush.  That is because I haven’t been REALLY looking at a problem before I dive in.  When I DO take the time to really strip everything out of the way and really get a good look at what I’ll be working on, that seems to be when things go really well.  So from now on, that is my goal: to not get surprised by the work load.

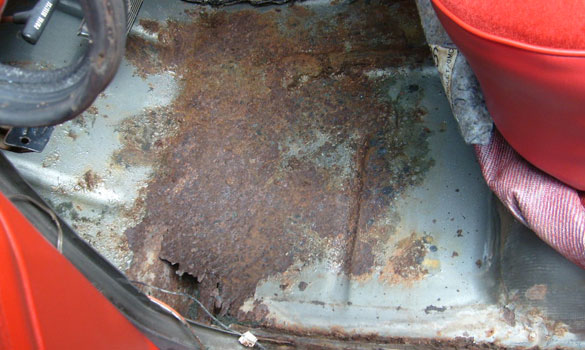
So back to the rust.  There is a lot of it.  I first took out the seats, seat belt bolts, and the various trim pieces holding down the carpet… by the way, if you ever decide to do this, I cannot stress enough how much you need a 9/16ths box end and a huge star bit for getting the seat bolts and seat belt bolts off.  Critical.  I had neither.

After the seats and other stuff was out, I stripped up the carpet and nasty moldy soggy under pads and what I assume is rotten Hushmat.  I threw it all out.  When all this is said and done, I will have a Rhinoliner type coating instead of carpet.  After I got out the carpet, I got a good long look at the situation.

The short of it is this: there is damage that will have to be fixed via cutting and welding in the following panels:  Both inner rockers, both outer rockers, both floor pans, the driver side cab support, both a-pillar bottoms, the driver side footwell.  I will possibly have to repair the passenger side footwell.  It wouldn’t surprise me.   Now the good news its this: I will not have to replace these panels in their entirety.  I can salvage a vast majority of both the inner and outer rockers on both sides – I’d say 60% or so –  and I think the passenger side cab support can be salvaged.  Of course, I’ve never actually done this, but I’ve done it many times in my head.  I have no doubt that I can cut, shape, and fit what I need to.  Welding is the only bit I’m worried about really.  But I guess this will be good practice.

I’m really really glad I will be able to keep most of the rockers as that will help line everything up a LOT.  the bottom of the a-pillars is going to be a bitch.  I’ll just have to wing it I suppose. Also fun: I will have to drop the fuel tank to do this.  But it is full of rust and needs replacing anyway.  I’ll do that at the same time.

All in all I think I’m looking at $750 or so in materials (that includes paint, discs, wire, primer, paint, liner – pretty much everything but the electricity).  My estimate is that it will take 5 full days.

As soon as I have the funds, I will begin.
rust2
rust3
rust4
rust5
rust6
rust7
rust8
rust9
rust10
rust11

EDIT 2014 Update:
I ended up having a guy do this welding work. I’ll post more on my update on that post.

Categories: Project Log Tags:

Rust-B-Gone!

August 24th, 2009 Comments off

I wrote this last night, but just realized I had never hit the publish button.  Sorry about that.  But here it is….

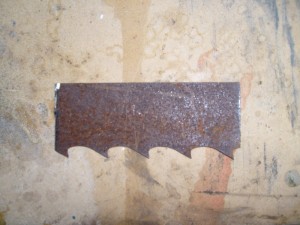
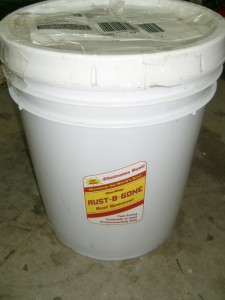
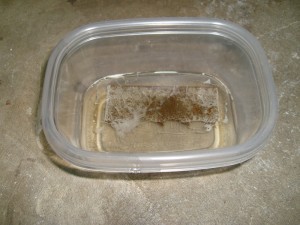
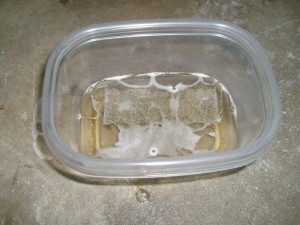
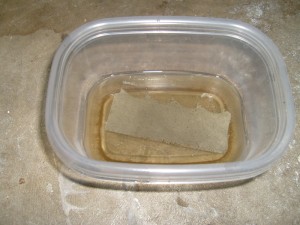
My five gallon bucket of Rust-B-Gone came while I was out of town.  So I decided to do a little experiment.  I took the rustiest thing I had (other than the truck) which was a very very old bandsaw blade and put it in a container of Rust-B-Gone.  It is about as close to magic as I think I’m going to get.  90% of the rust was gone after 10 minutes.  I did NOT hit it with a wire brush or clean it in any way before putting it in the Rust-B-Gone.  I just cut a section and threw it in.

MAN this stuff is cool.  When I opened the bucket I thought it smelled familiar.  It smells a whoooooole lot like the muriatic acid we use at the knife co-op to etch pattern welded blades.  It is about the right color too for a seriously diluted mix.  I may have some more experimentation to do to find out if that is the case.

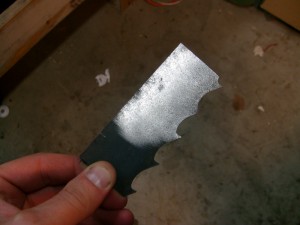
Anyway, after 5 minutes a vast majority of the rust was gone.  After 10 (as mentioned) almost all of it was gone.  After 30 it looked pretty darn clean.  So I took it out and washed it and dried it off.  As soon as you take it out of the solution, it gets a thin black oxide layer on the surface.  But it is about the consistency of candle soot, and a very quick pass with the wire brush makes everything gleam.

I’m going to try the roll-on application later in the week.

This is the rusty blade I'm testing

This is the rusty blade I'm testing

5 gal bucket of awesome.

5 gal bucket of awesome.

Rusty blade in the Rust-B-Gone

Rusty blade in the Rust-B-Gone

Rust-B-Gone after 5 minutes

Rust-B-Gone after 5 minutes

Rust-B-Gone after 10 minutes

Rust-B-Gone after 10 minutes

Rust-B-Gone after 30 minutes

Rust-B-Gone after 30 minutes

Out of the Rust-B-Gone and washed.  Black oxide formed.

Out of the Rust-B-Gone and washed. Black oxide formed.

After a quick swipe with the wire brush.

After a quick swipe with the wire brush.

Categories: Project Log Tags:

Floorpan Rust

August 20th, 2009 Comments off

Woo hoo!  I have the welding task cut out for me.  Glad I’ll be getting a new floor pan and rocker panel in the mail soon.  I’m gonna need em.  By the way, if you are looking for the absolute best place to get panels, you will find the best service and prices at: Mike’s Bump and Grind Garage.  That is where I ordered a majority of mine, and they are awesome.

floorpan_rust1

floorpan_rust1

floorpan_rust1

floorpan_rust1

floorpan_rust1

floorpan_rust1

Categories: Project Log Tags:

Little Things, But Major Annoyances

August 19th, 2009 Comments off

I knocked out several of the little things that annoy me in the truck this week.

1) Ignition – It stuck.  Badly.  Like to where I had to really twist the crap out of it to get it to disengage the starter.  So, I went to O’Reilly’s and got a new ignition cylinder.  Got it back home, cracked the Haynes manual open and started the dis-assembly.  But none of the pictures in the book looked like what I was seeing.  The description didn’t match either.  It talked about an “ignition cylinder retaining screw”, which my column most certainly lacked.  Nor did it have a tell-tale hole where one might have been.  Only when I looked back to the “earlier models” section did I find instructions that worked on mine.  Needless to say, the cylinder I bought didn’t work, so i had to run and exchange it for a new one (turns out my column is from a ’76).  The old one had bits of spring jutting out all over the place.  Looked very broken.  But the new one slid back in and I got everything back together and it works great now.  Bonus: I had to fashion a tool to complete this job.  There is a plate that sits between the steering wheel and the rest of the steering column.  It is called the “lock plate” apparently.  That plate has to be removed to get to the release for the ignition cylinder.  That plat, however, has a very large spring behind it.  There is a little lock ring on the shaft that hold the plate back.  So to remove it, you first have to press that plate down FURTHER so that you can get at the small, slippery, stubborn lock ring.  So I create a U shaped bracket.  It had a hole in the center large enough to pass over the shaft.  Then I tightened down the nut on the shaft, which then pushed the bracket, which then depressed the lock plate, which then allowed me to get the lock ring off.  This took about 5 hours to figure out.  And I now have a tool I’m likely never to use again, but that worked PERFECTLY this once.  That makes me happy.

2) Vent Window – Brian helped me with the vent window.   Took about 30 minutes to find the perfect set of movements to wrench it out of the  door.  Good news: the interior of the door looks fantastic.  Very little rust.  Plus, the new vent window from pull-a-part went in perfectly.  I now have airflow!

3) Door Hinge Pins and Striker – This took a looooong time.  I had to do it by myself.  I ratcheted off the hinge bolts and came to the panicked discovery that the door weighs forty million pounds, or there abouts.  So I had to hold it up with one arm while I took the rest of the bolts off and then catch the thing.  Some lower back damage later, I had it safely on the grass.  I then had to cut the old hinge pins out, clean everything up and re-grease, then put the new pins and bushings in.  Then I had to build a scaffold to set the door up while I bolted it back into place.  Then I installed the new striker.  It closes like new now!  No more slamming it shut!

The fuel thing is really bugging me.  It only seems to have a problem RIGHT when you start it, and after you’ve been driving it a good while.  But good news –  a new tank is only $100, so that is on the list now.  Bad news: my fuel needle sits on half a tank now no matter what.  I have no idea why.

I also got a good look under the carpet on the driver side.  And saw the ground.  Hopefully the new floor pans get here soon, cause I’m wanting to get that done.

EDIT 2014 Update:
I’ve ended up completely rebuilding the vent windows. It is pretty much required on these trucks, but it wasn’t horribly complicated. I have brand new door shells and new hinges, so all of that will be getting fixed. I never could get the old ones to work right anyway.

Categories: Project Log Tags: